
Use NordVPN in Garuda Linux by getting your subscription ( https://nordvpn.com )and following the next steps:
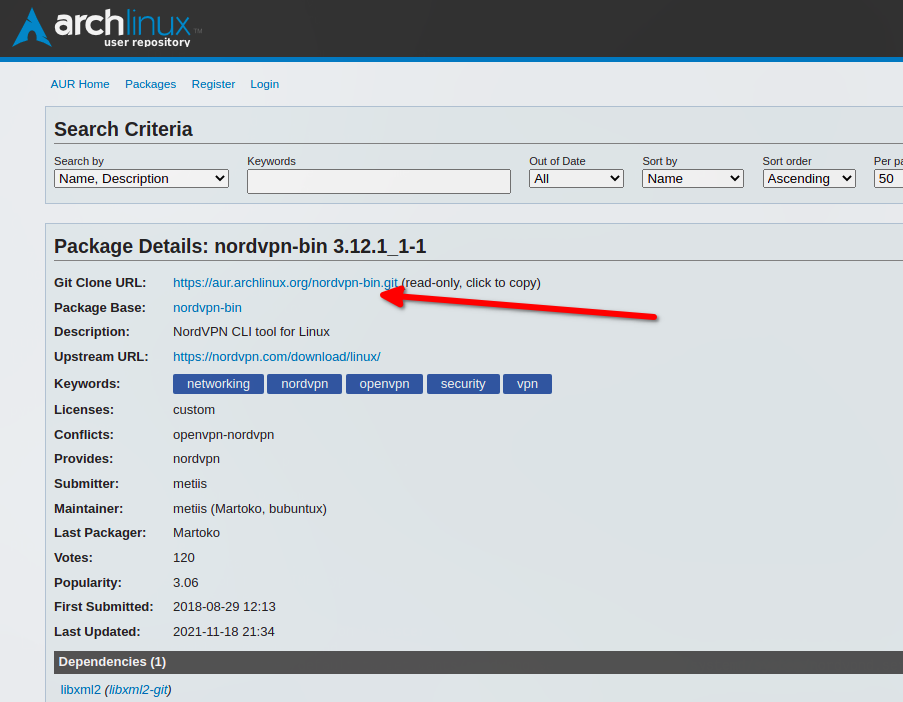
First go to https://aur.archlinux.org/packages/nordvpn-bin/ and click to copy on the GIT link:
Open your bash-console emulator, and install GIT
sudo pacman -S gitthen press “Y” when prompted.
After completing the GIT installation, proceed to download the NordVPN binaries using the Git Clone URL:
sudo git clone https://aur.archlinux.org/nordvpn-bin.git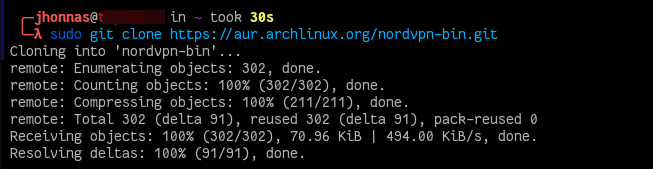
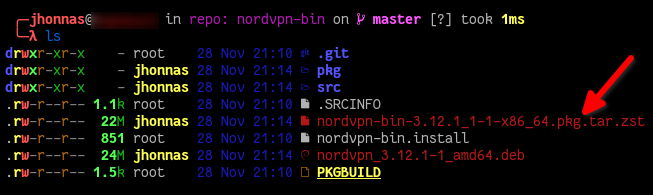
Now use the “ls” command to find the directory:
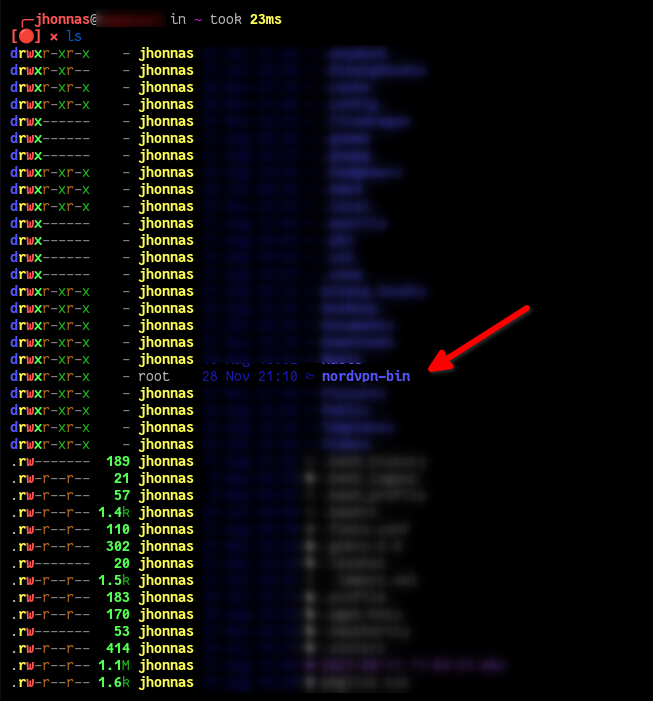
Jump into that container
cd nordvpn-binList the files and directories, and use the “ls” command, you should have these files:

you can use the “chown” command:
chown username:groupname FILE_NAME
#for example:
chown jhonnas:jhonnas PKGBUILD
Or, you can use the “mc” command to do it with the “Midnight Commander” (If you don’t have it installed, do it: sudo pacman -S mc
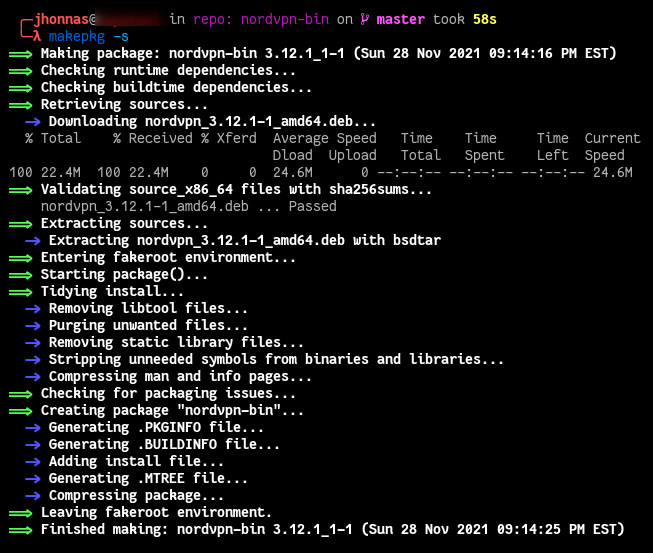
After changing the file ownership, now you can run the “makepkg -s” command:
use the “ls” command and copy the installation package file name (the file with .pkg.tar.zst):
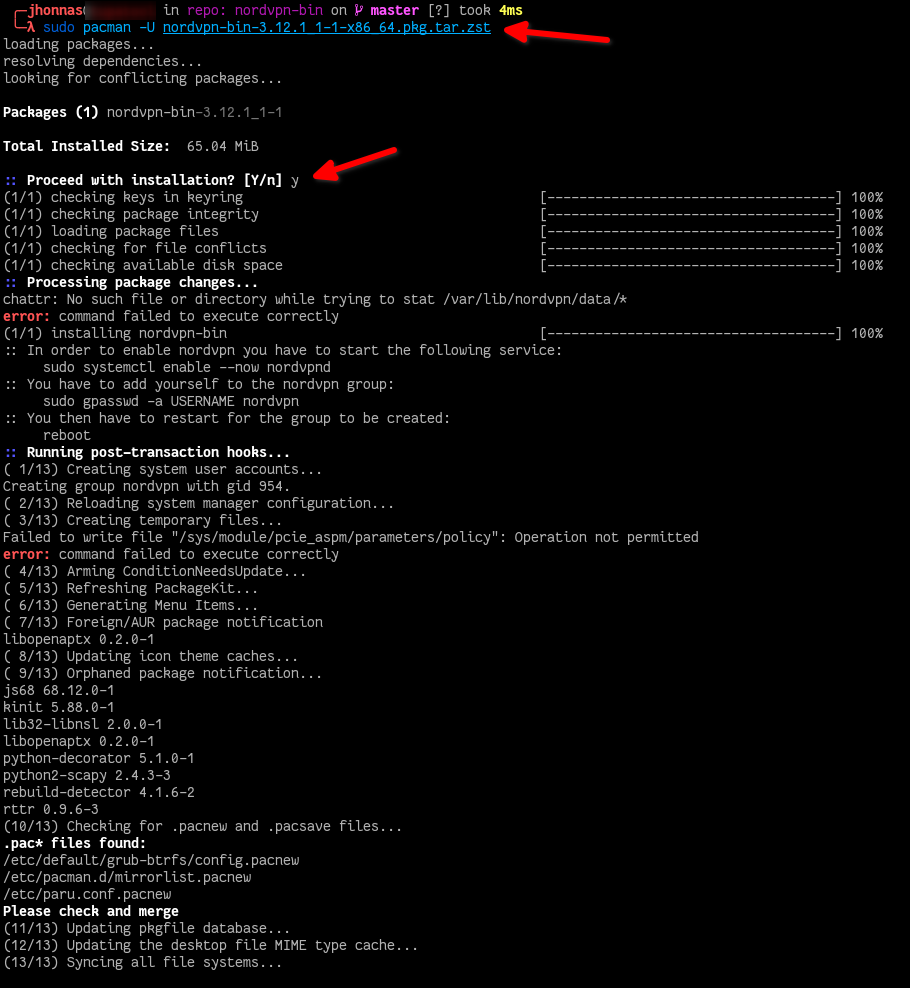
Now, with “pacman” install NordVPN on your system, press “y” and “enter” when prompted:
The next step is to enable the NordVPN daemon using:
sudo systemctl enable --now nordvpnd
check the daemon status using “systemctl”:

The next step is to connect with your NordVPN account:
sudo nordvpn login
Now you are ready to connect with/through any of the available countries.
To list available countries use:
sudo nordvpn countries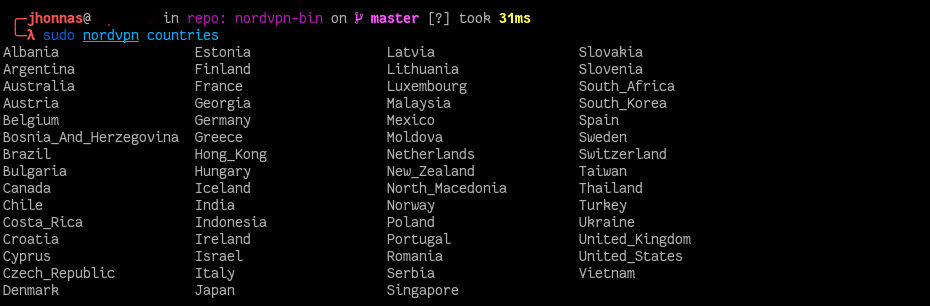
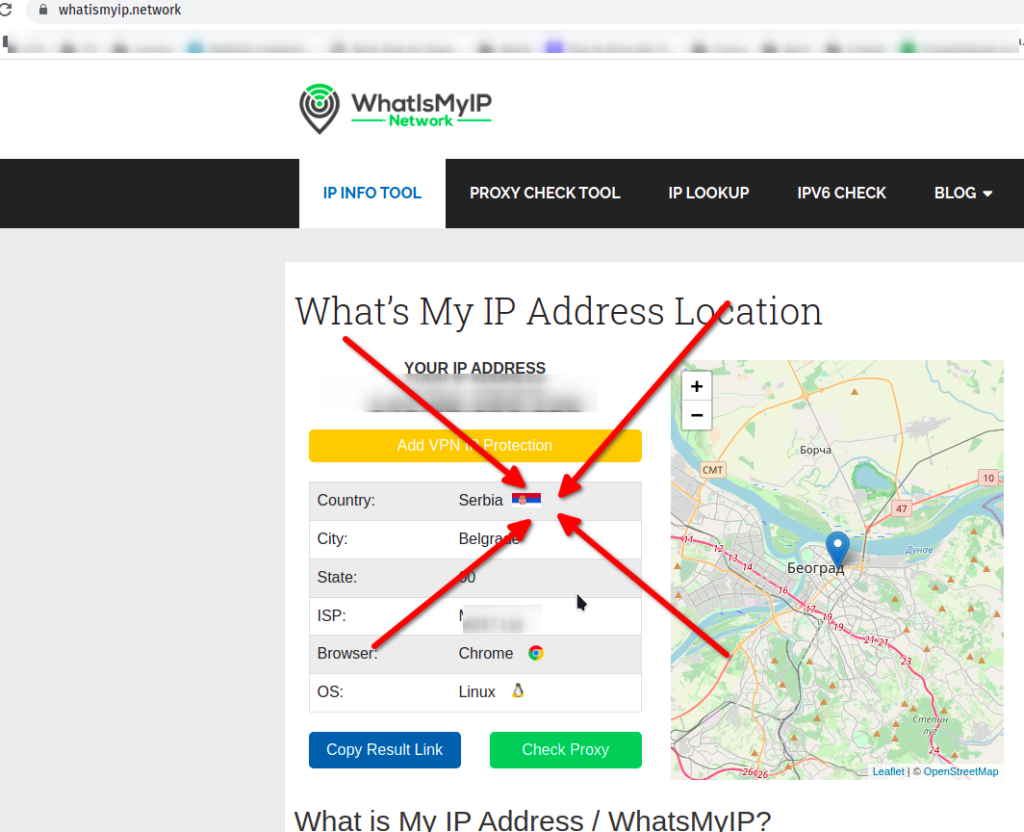
To connect use “sudo nordvpn connect country_name” which is the same as “sudo nordvpn c country_name”. To disconnect use “d” instead (“sudo nordvpn d”) For example, I’ll connect from Serbia using “sudo nordvpn c Serbia”:

I hope that you can find this useful!
Hi to all, it’s really a pleasant for me to pay a visit this website, it consists of
helpful Information.
Your style is very unique compared to other people I’ve read stuff from.
I appreciate you for posting when you’ve got the opportunity, Guess I will just book mark this site.
Very instructive and fantastic structure of subject matter,
now that’s user pleasant (:.
Allso visit my web-site – truck repair manuals (Link)
thing i need, 🙂
consists of the book itself