Follow these steps to successfully configure RAID 1 in your Linux OS
First, confirm /install/update “mdadm” : (yum for Red Hat distributions, apt-get for Debian distr, pacman for arch distr)
# yum install mdadm
# apt-get install mdadm
# pacman -S mdadm
Then confirm what drives you are about to work with:
# fdisk -l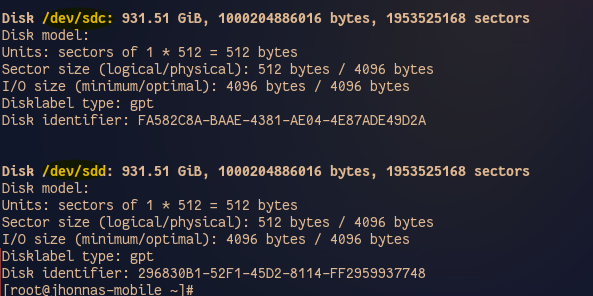
Once you’ve identified, check if there are previous raid configurations:
# mdadm -E /dev/sd[c-d] 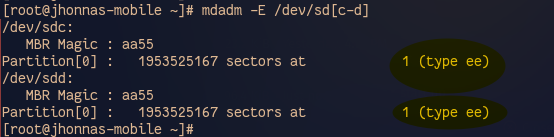
I used “c” and “d”, in your case, your disks may be different, please double-check the “fdisk -l” results and identify your drives letters (sdb,sdc,sdd, etc). Make sure that you’re not going to blow any other disk partitions by mistake!
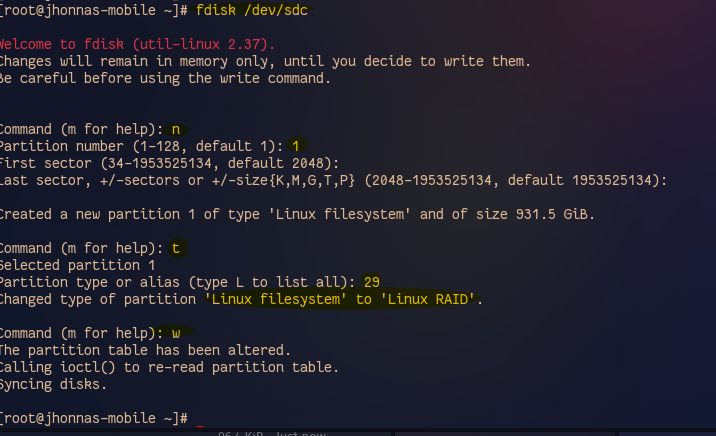
Now is the time to create the partitions.
# fdisk /dev/sdc- Press “n” for new partition.
- press “1” and leave the default sectors configurations by pressing enter again and again.
- press “t” to choose type (in my case, I used Garuda Linux, my option for RAID type was “29”. You may Press “L” to list them, then press space bar until you find the numbers associated with this type, then those are the number that you may write after pressing “t” to select the type.
- Type “w” to write.
Now, repeat the previous step, but with the other disk
# fdisk /dev/sddCheck that there are no superblocks
# mdadm -E /dev/sd[c-d]1
mdadm: No md superblock detected on /dev/sdc1.
mdadm: No md superblock detected on /dev/sdd1.
The next step: Create RAID1
# mdadm --create /dev/md0 --level=mirror --raid-devices=2 /dev/sd[c-d]1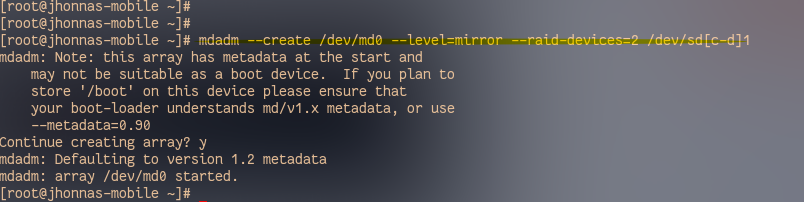
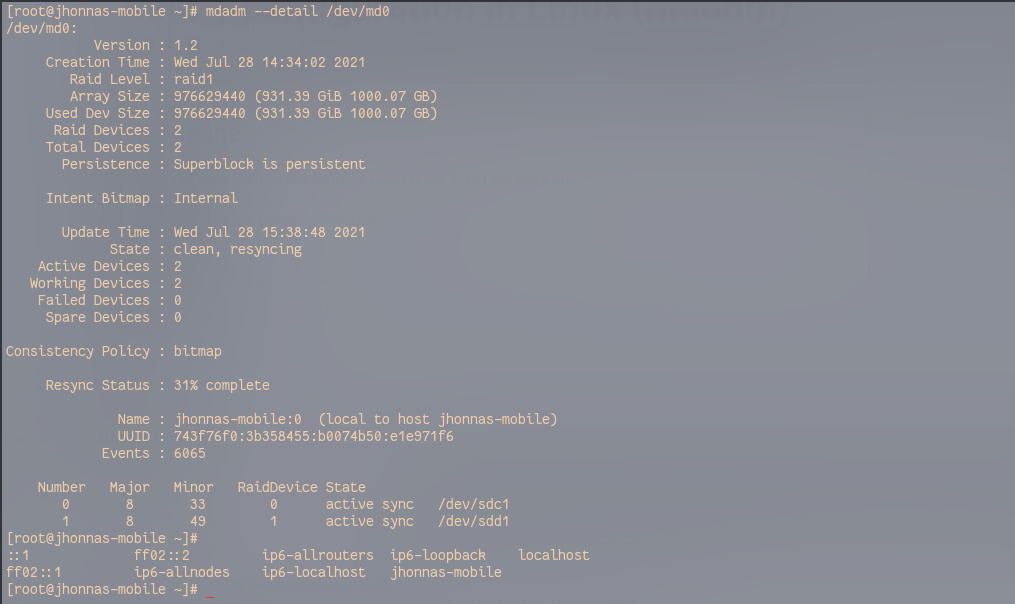
Now Check RAID type and configuration:
# mdadm -E /dev/sd[c-d]1Also, you can check the RAID and resycn status:
# mdadm --detail /dev/md0
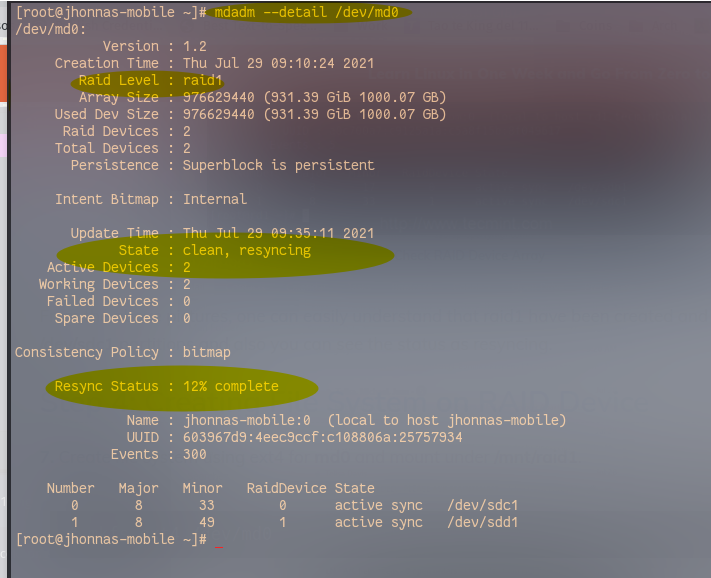
The RAID1 is complete. Now you may want to mount it:
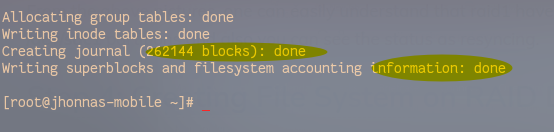
First, create the file system (ext4) in this case, for md0. And mount it on a new mounting point:
# mkfs.ext4 /dev/md0Confirm by typing “y”, then wait for it to be completed:
# mkdir /mnt/raidmirror
# mount /dev/md0 /mnt/raidmirror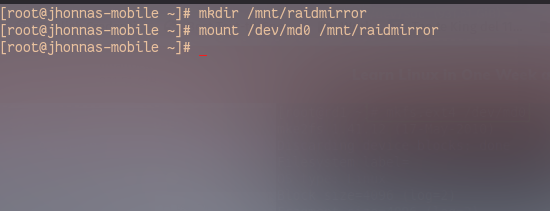
You can test and start using your RAID. But, is a good idea to edit, the fstab file to have it mounted after power cycling your computer, I will use nano:
# nano /etc/fstabthen type your mounting configuration at the bottom. It should look similar to this:

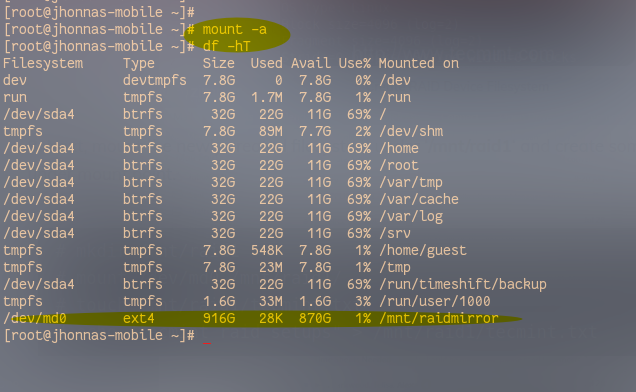
Then check the fstab configuration by using the mount -a command. Then, check the mounted partitions using the command df -hT:
Your RAID1 is working, remember to modify permissions if needed for more users.
if you want all users to have access:
# chmod 777 /mnt/raidmirror (for all users)And that’s it! I hope that you have found this useful.