First, the “what is…”, then the “Why?”, ending with a good one of many “How”.
What is Hard Drive Sanitization?
To prevent unauthorized access or recovery, hard drive sanitization permanently removes all data from a storage device, such as a hard drive or solid-state drive (SSD m.2 or NVMe). Unlike simple file deletion or formatting, which may leave recoverable data traces, proper sanitization ensures the data is completely irretrievable.
There are three primary methods of hard drive sanitization:
Degaussing – Using a powerful magnetic field to erase all data on magnetic storage media. (I’ve never tried this, so I will not recommend it).
Data Overwriting – Writing random data patterns multiple times over the entire drive to make original data unrecoverable. I’ll show you how easily you can do this with a few commands)
Physical Destruction – Shredding, crushing, or incinerating the drive to ensure data cannot be accessed.
Media sanitization is one key element in assuring confidentiality. Confidentiality is defined as “preserving authorized restrictions on information access and disclosure, including means for protecting personal privacy and proprietary information…”10 Additionally, “a loss of confidentiality is the unauthorized disclosure of information.”
https://nvlpubs.nist.gov/nistpubs/SpecialPublications/NIST.SP.800-88r1.pdf
more at: NIST.GOV
Why is Hard Drive Sanitization Important for IT Professionals?
IT professionals handle sensitive data, including corporate records, customer information (PII), and confidential business files. Properly discarding hard drives is crucial for several reasons:
Data Security – Prevents unauthorized access to sensitive information, reducing risks of data breaches.
Regulatory Compliance – Many industries have strict data disposal regulations, such as GDPR, HIPAA, and PCI-DSS, which require organizations to erase or destroy drives securely.
Prevention of Data Recovery – Formatting alone does not erase data; proper sanitization ensures it cannot be recovered using forensic tools.
Protecting Organizational Reputation – Data leaks from improperly discarded drives can damage a company’s reputation and lead to legal consequences.
Environmental Responsibility – Secure drive disposal methods, such as certified recycling, help reduce e-waste while ensuring data security.
Following best practices for Hard drive disposal, such as using certified data erasure software, manually overwriting and “zeroing” the disk, physically destroying drives, and partnering with certified e-waste disposal services, instills confidence in IT professionals about their ability to handle this crucial task (Yes! It’s crucial.).
Physically destroy drives that are no longer needed.
IT professionals can safeguard sensitive data and maintain cybersecurity best practices following these practices.
An example:
On your Linux computer, connect the drive (Directly on the computer or by using an USB adapter).
In this case, I used a Linux VM installed on VMWARE Workstation Pro. (If this is your case by chance, ensure the USB compatibility is set to USB 3.1, or your drive may not be recognized).

Start by identifying the drive with:
sudo fdisk -l

You’ll get different information about your drives, identify the drive (/dev/sdX). If you don’t trust yourself, take note of the drives listed with this command, disconnect the disk you want to sanitize, and run fdisk again. By connecting it again, you might be sure about what drive (sdb,sdc…) you are working on. (sda is usually the device where your system is installed, if you don’t have more disks and see “sdb”, matching size and other characteristics, you may confirm you are not wiping another drive by accident.
Now you identified the device name on your system, proceed with the sanitizing process. One simple but powerful command:
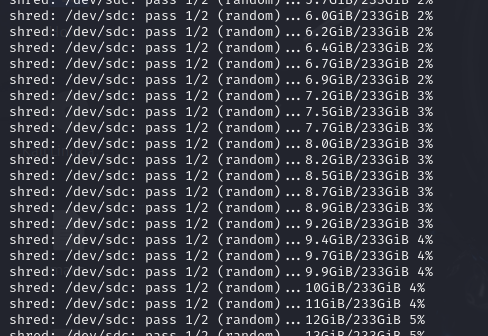
sudo shred -v -n 1 -z /dev/sdX
(-v Verbose -n 1 passes -z adds a final pass with zeros to hide the random data from previous pass)
Remember, you must substitute the “X” with the one you verified before.
Now the process has started and it could take several minutes depending on your drive’s size, its speed, and more.

Once this process ends, your drive has been sanitized. Congratulations! You may discard it now.
If you want to verify it, use:
sudo dd if=/dev/sdX bs=512 count=10 | hexdump -C
There are differents ways, this is the one that works faster for me.
The output should contain zeros followed by more zeros.

Never forget to do this, or something like this; you will not lose sleep thinking about “who’s gonna read that data?” – It’s gone.
Excellent tutorial sir!, I must agree with you that handling such sensitive data requires extra effort, which must be a must for any It professional, taking that extra step!.
Indeed! I’m looking forward to expand the options for different OS’s and maybe testing some tools. I’ll let you know! thanks for commenting!